S32DS集成MCAL

简介:MCU 为 NXP-S32K344;RTD MCAL 版本为 SW32K3_RTD_R21-11_4.0.0_HF_02 ;S32DS 3.5;EB Tresos 29.0

1 安装 MCAL

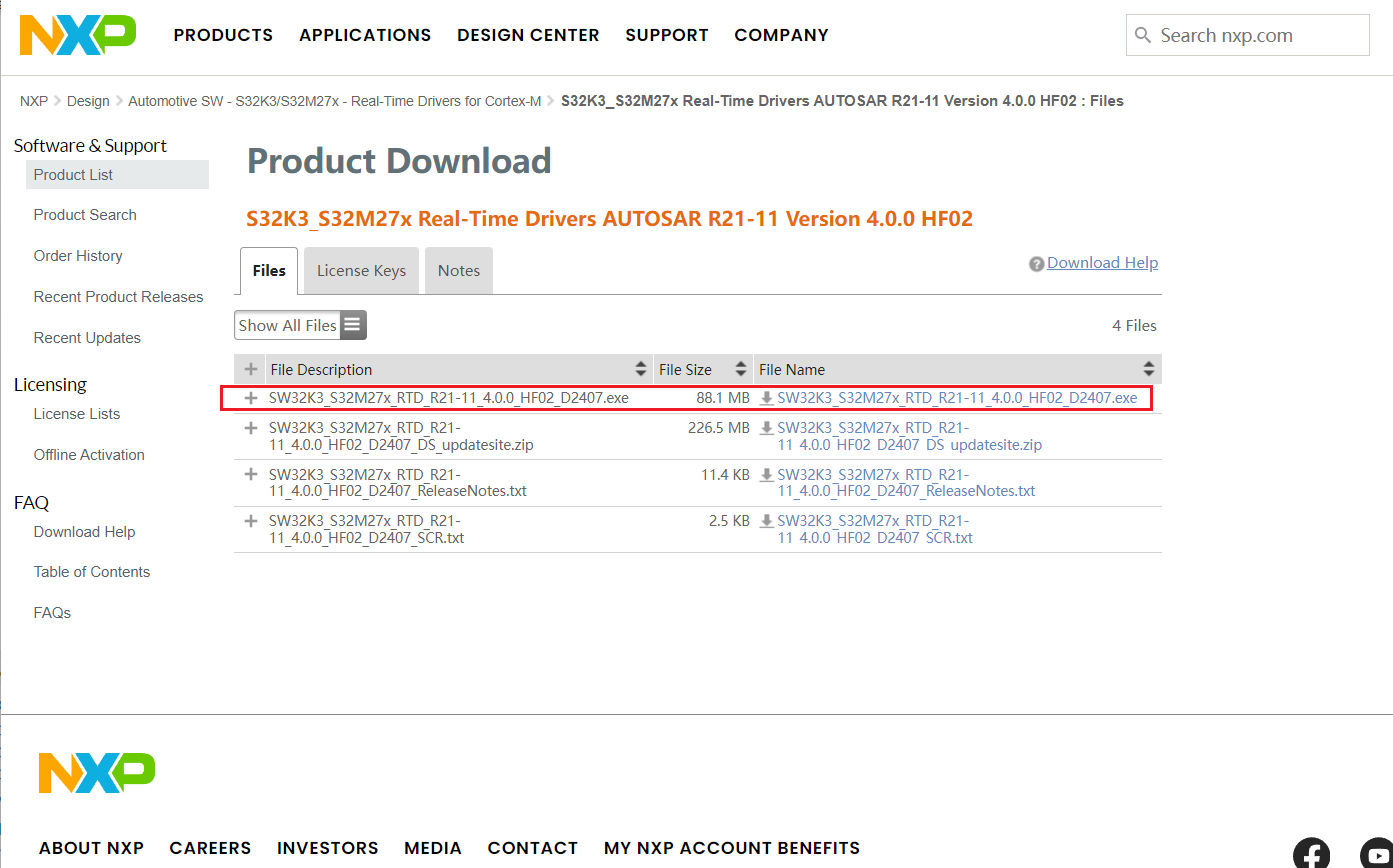
下载此版本的 RTD:S32K3_S32M27x Real-Time Drivers AUTOSAR R21-11 Version 4.0.0 HF02

下载并安装此版本的 MCAL:
这里,我的安装后的 MCAL 的路径如下:
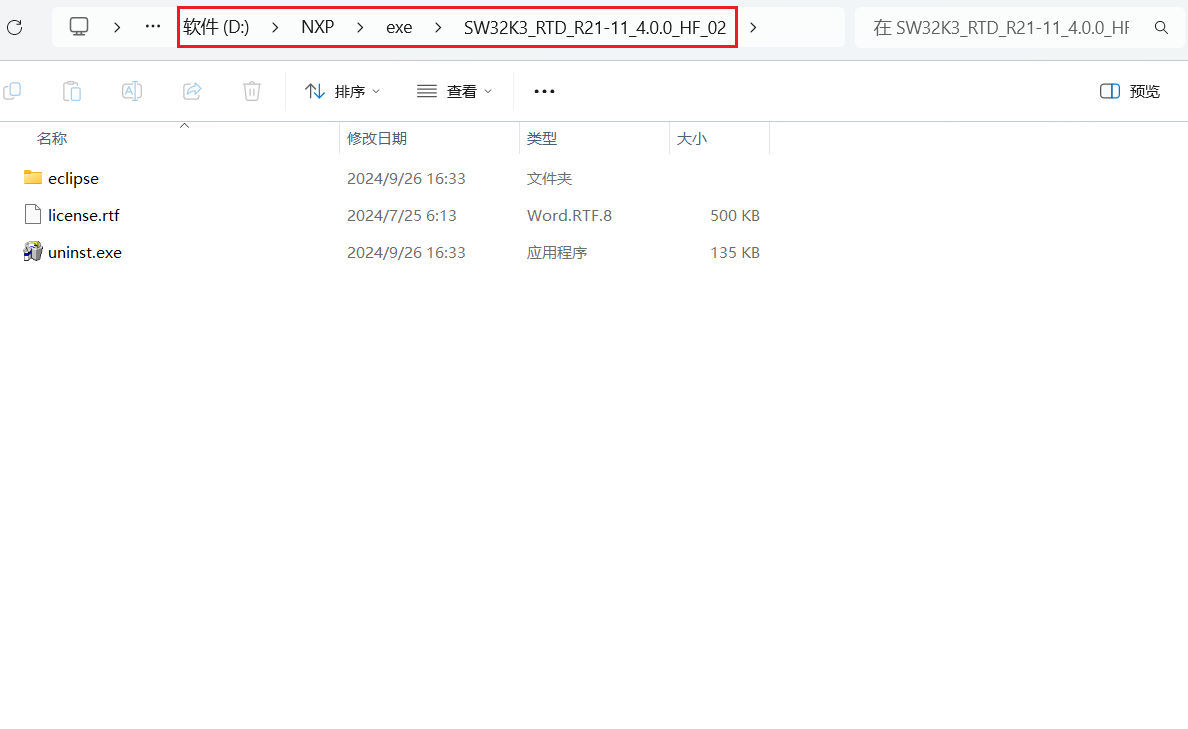
1.1 MCAL 的配置

复制 MCAL 路径下的所有模块到一个临时文件夹中进行下一步处理,我这里就是复制 D:\NXP\exe\SW32K3_RTD_R21-11_4.0.0_HF_02\eclipse\plugins 下的所有文件夹到一个临时文件夹 plugins_handle 中:
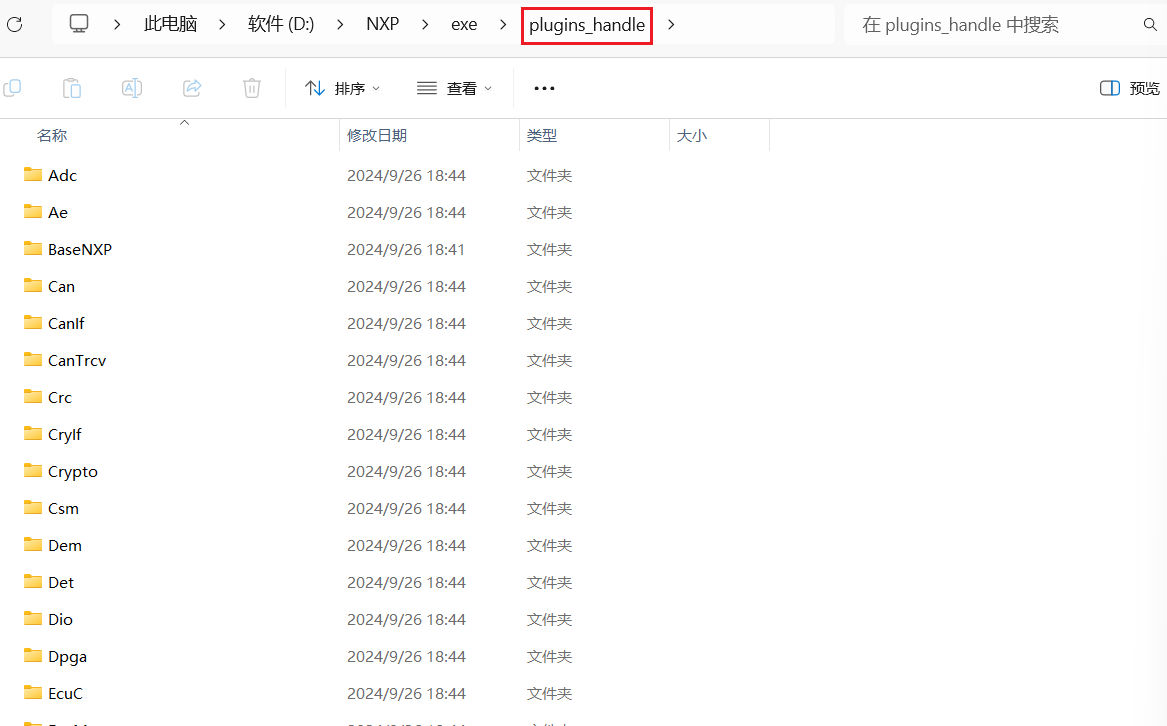
对各模块的文件夹进行重命名,更好看些,使用如下 python 脚本进行重命名:

1
2
3
4
5
6
7
8
9
10
11
12
13
14
15
16
17
18
19
20
import os

# 获取当前路径
current_path = os.getcwd()

# 遍历一级文件夹
for folder in os.listdir(current_path):
if os.path.isdir(folder):
# 获取新名称,即第一个下划线之前的内容
first_part = folder.split('_')[0]

# 检查是否需要处理
if first_part != "Mem":
new_name = first_part

# 检查新名称是否已存在
if not os.path.exists(new_name):
os.rename(folder, new_name)

print("文件夹名称已更新。")

使用方法:在临时文件夹(D:\NXP\exe\plugins_handle)中新建并复制上面👆代码到 rename.py 中,然后运行

上面这三个文件夹需要手动重命名为如下(脚本已自动忽略处理这三个文件夹):

接下来,删除每个模块文件夹中除了 src 和 include 之外的所有文件,其中 BaseNXP、Platform 这两个模块需要手动处理,使用如下脚本进行删除:

1
2
3
4
5
6
7
8
9
10
11
12
13
14
15
16
17
18
19
20
21
22
23
24
25
26
27
import os
import shutil

def clean_directories(base_path):
# 列出当前路径下的一级文件夹
for folder in os.listdir(base_path):
folder_path = os.path.join(base_path, folder)

# 只处理文件夹,且不处理“BaseNXP.Base”和“Platform”
if os.path.isdir(folder_path) and folder not in ["BaseNXP", "Platform", "Base"]:
# 遍历文件夹中的内容
for item in os.listdir(folder_path):
item_path = os.path.join(folder_path, item)

# 检查是否是文件夹,且不是“src”或“include”
if os.path.isdir(item_path) and item not in ["src", "include"]:
print(f"删除文件夹: {item_path}")
shutil.rmtree(item_path) # 删除文件夹

# 检查是否是文件
elif os.path.isfile(item_path):
print(f"删除文件: {item_path}")
os.remove(item_path) # 删除文件

if __name__ == "__main__":
current_path = os.getcwd() # 获取当前路径
clean_directories(current_path)

脚本已忽略处理 BaseNXP、Platform 模块,需要手动修改:

BaseNXP 保留如下三个文件夹:

Platform 保留如下:

进一步,其中 Platform/build_files 下仅保留 gcc;Platform/startup/src/m7 下仅保留 gcc、exceptions.c、startup.c

然后,导出各模块的 include 路径,使用如下脚本:

1
2
3
4
5
6
7
8
9
10
11
12
13
14
15
16
17
18
19
20
21
22
23
24
25
26
27
28
29
30
31
32
33
34
35
36
37
import os

# 示例路径,保留""
template_path = '"${workspace_loc:/${ProjName}/MCAL/DIR/include}"'

# 当前路径
current_path = os.getcwd()

# 创建一个列表来存储所有路径
paths = []

# 遍历当前路径下的一级文件夹
for folder in os.listdir(current_path):
folder_path = os.path.join(current_path, folder)
# 检查是否为文件夹
if os.path.isdir(folder_path):
# 检查是否存在 'include' 文件夹
include_folder = os.path.join(folder_path, 'include')
if os.path.exists(include_folder):
# 将 DIR 替换为当前文件夹名称,且保留""
new_path = template_path.replace('DIR', folder)
# 添加到路径列表
paths.append(new_path)

# 在列表开头插入三个新路径
paths.insert(0, '"${ProjDirPath}/include"')
paths.insert(0, '"${workspace_loc:/${ProjName}/MCAL/Platform/startup/include}"')
paths.insert(0, '"${workspace_loc:/${ProjName}/MCAL/BaseNXP/header}"')
paths.insert(0, '"${workspace_loc:/${ProjName}/generate/include}"')

# 打开 path.txt 文件用于写入
with open(os.path.join(current_path, 'path.txt'), 'w') as output_file:
# 写入所有路径到 path.txt
for path in paths:
output_file.write(path + '\n')

print("路径已写入到 path.txt 文件。")

此脚本会在当前运行路径下生成 path.txt 存放各模块的 include 路径

2 S32DS Project

2.1 新建 Project

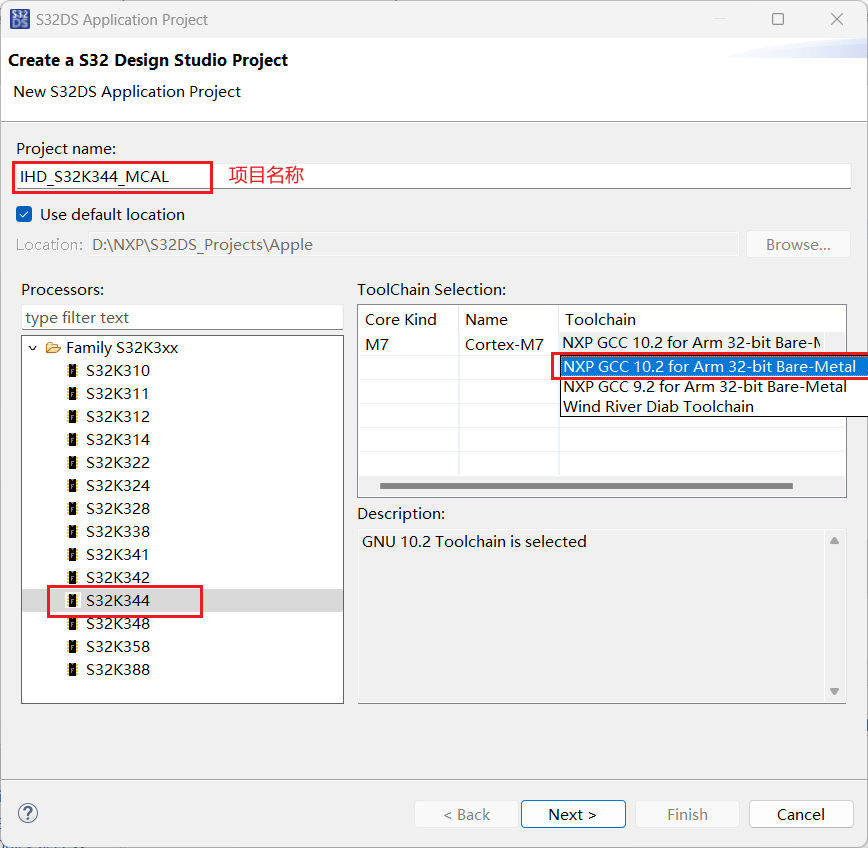
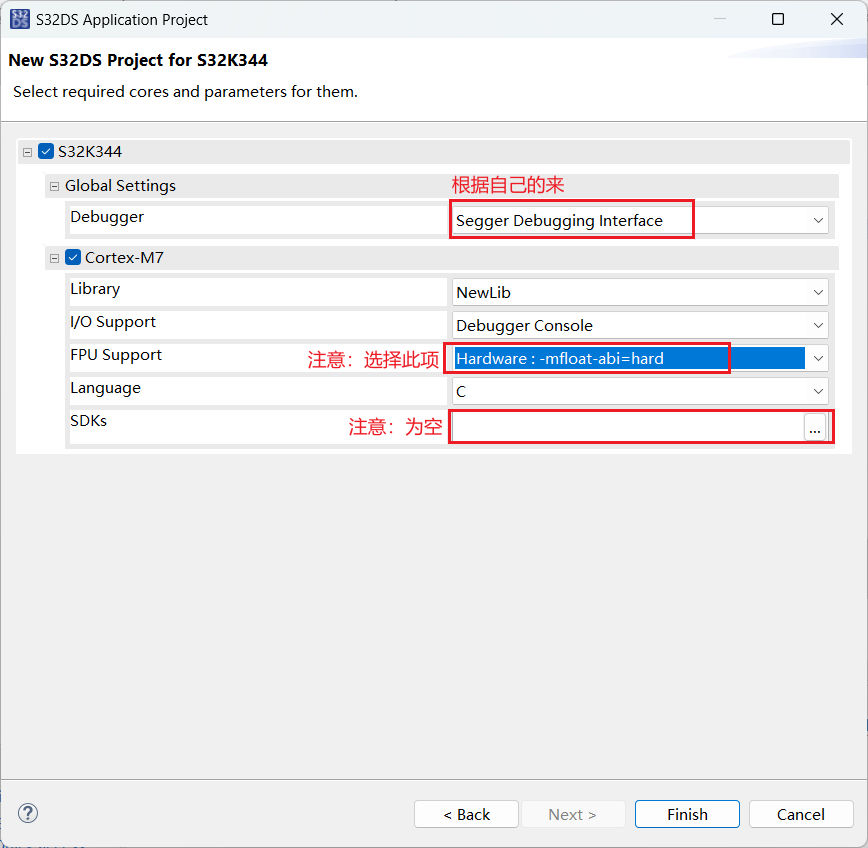
新建一个空项目:

删除项目中的这三个文件夹:
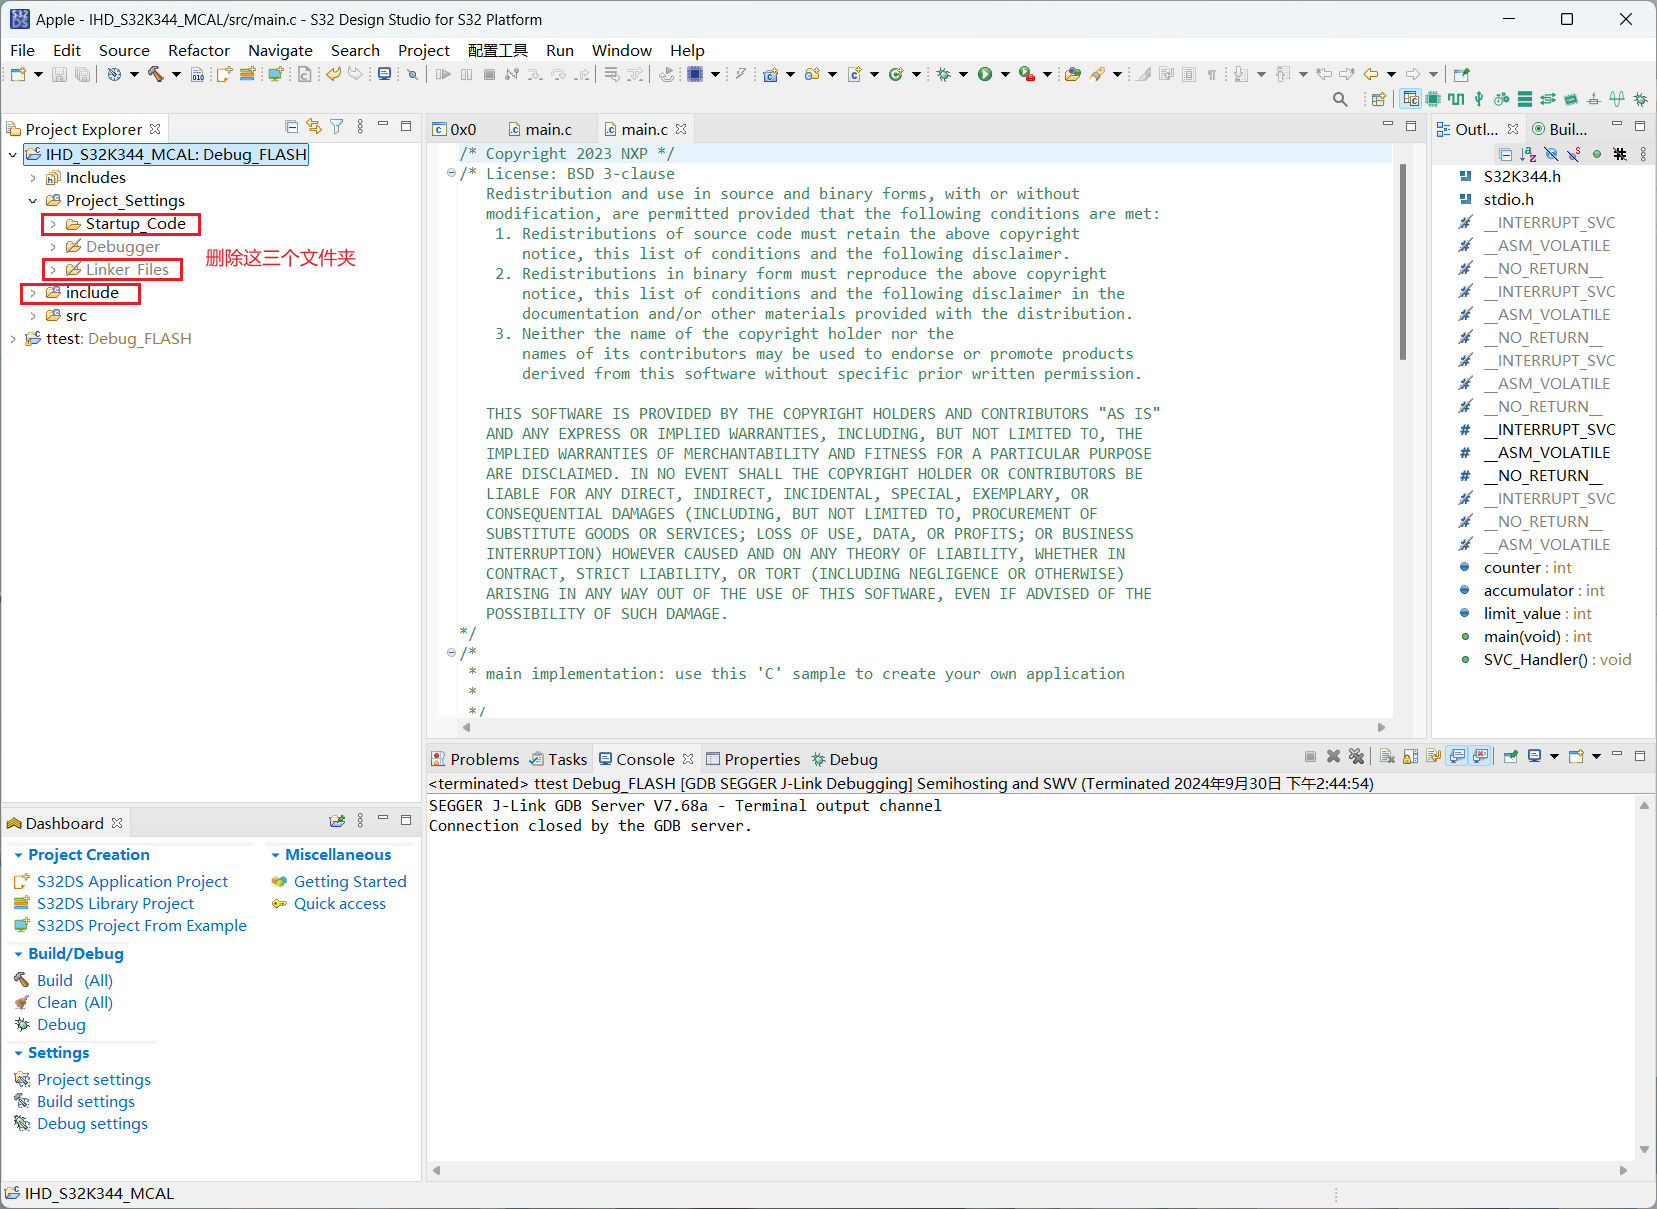
新建这三个文件夹:
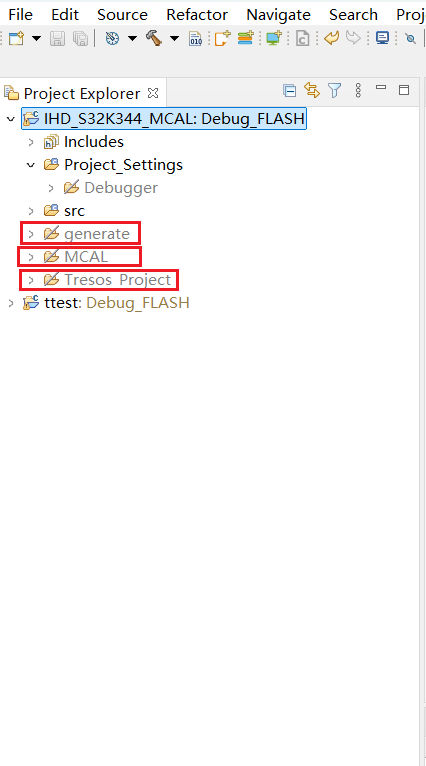
其中,MCAL 用来存放 MCAL 各模块驱动的源码;generate 用来存放 EB_Tresos 工具生成的代码;Tresos_Project 是 EB 项目的路径

将这三个文件夹添加到编译路径里:
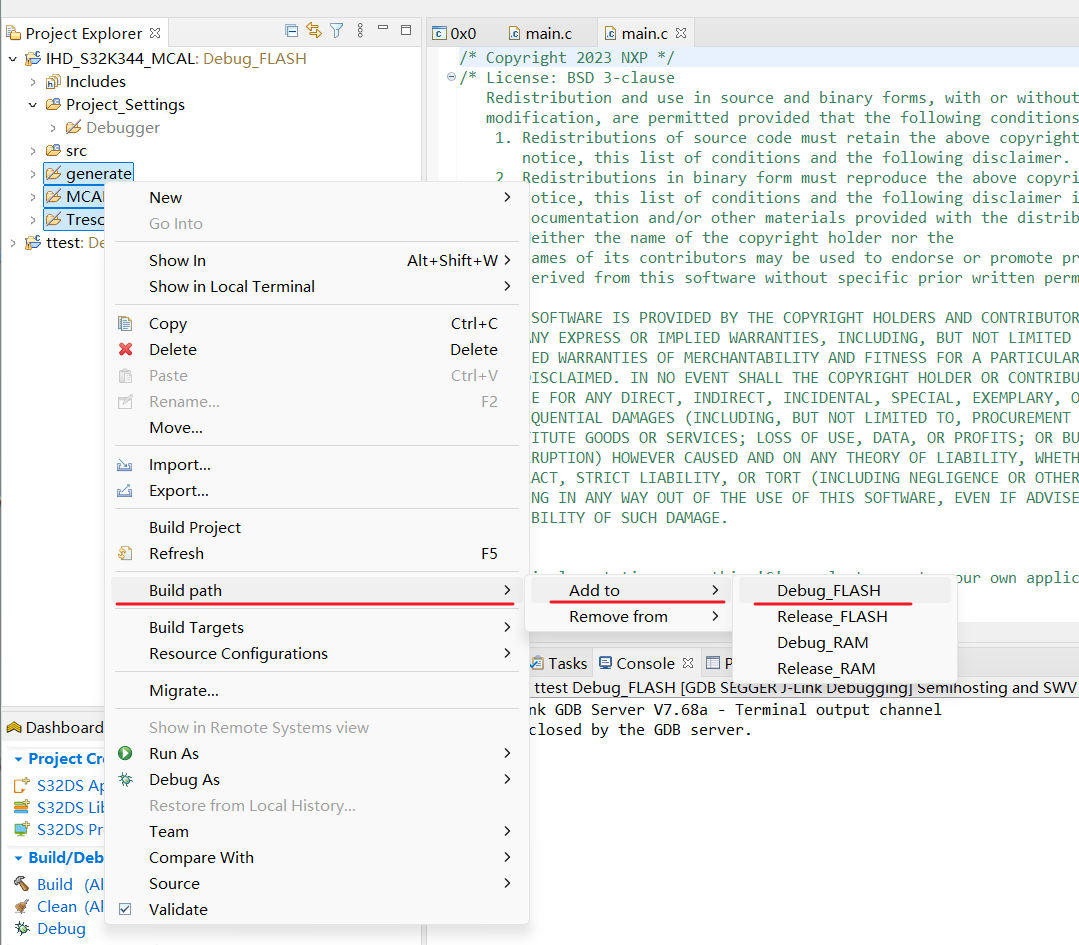
复制临时文件夹中所有模块的源码到 S32DS 项目的 MCAL 文件夹中:

2.2 配置 Project

右键项目选择 Properties:

添加如下定义:

1
2
3
4
5
6
7
8
S32K3XX
AUTOSAR_OS_NOT_USE
S32K344
GCC
USE_SW_VECTOR_MODE
D_CACHE_ENABLE
I_CACHE_ENABLE
ENABLE_FPU

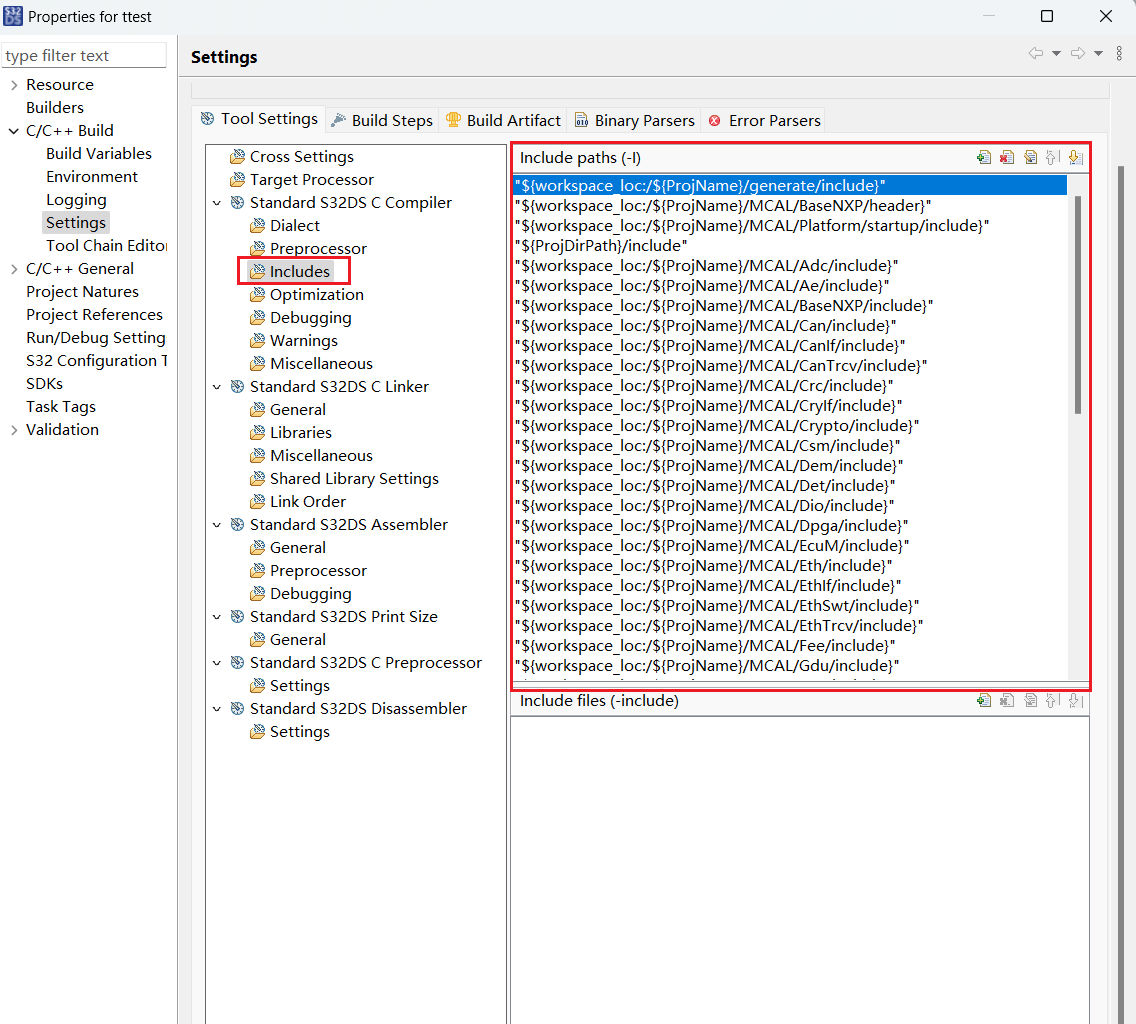
添加头文件,将临时文件夹下 path.txt 中的所有内容复制到此处:

选择优化选项:

-fno-short-enums -funsigned-char -fomit-frame-pointer -fstack-usage

配置链接器:
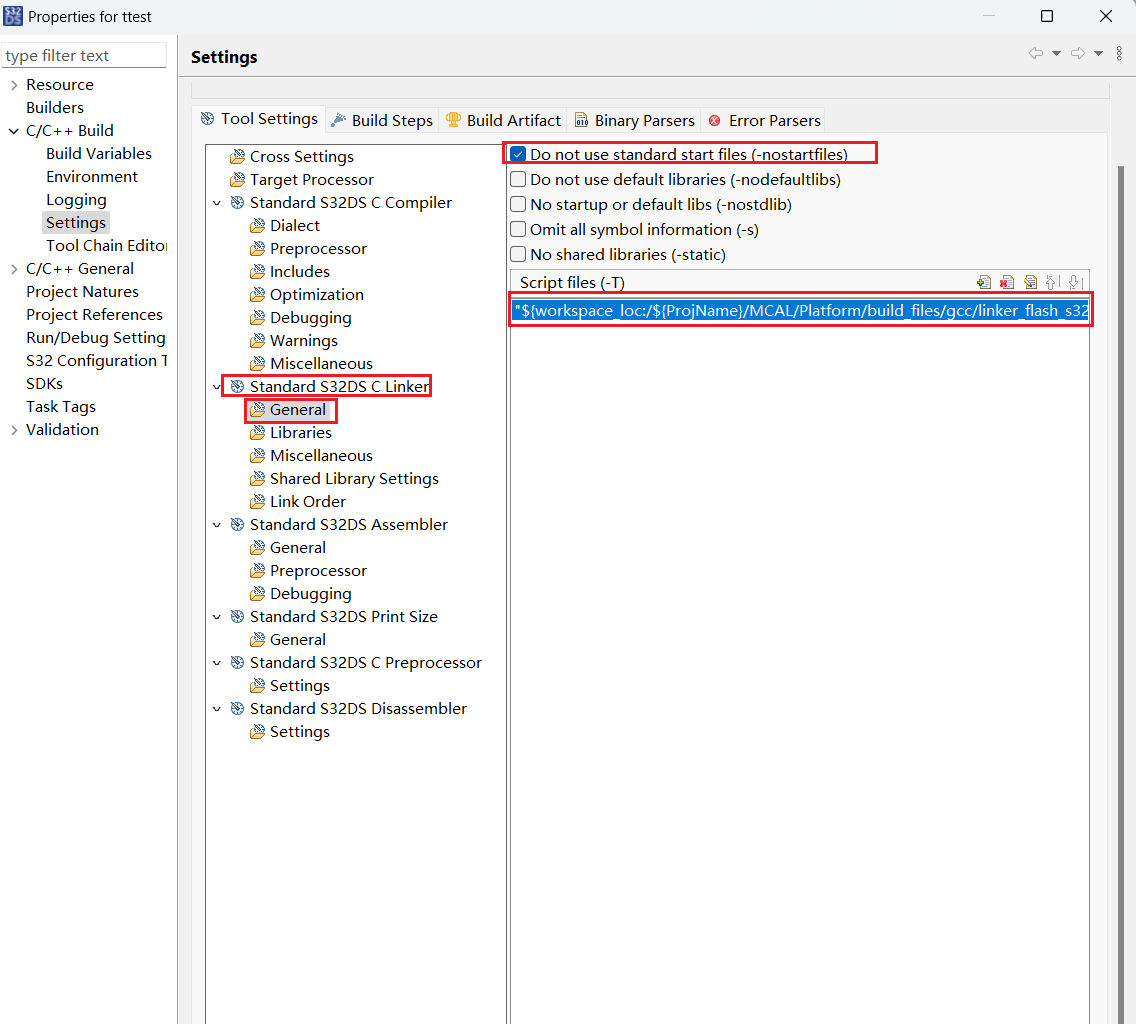
"${workspace_loc:/${ProjName}/MCAL/Platform/build_files/gcc/linker_flash_s32k344.ld}"

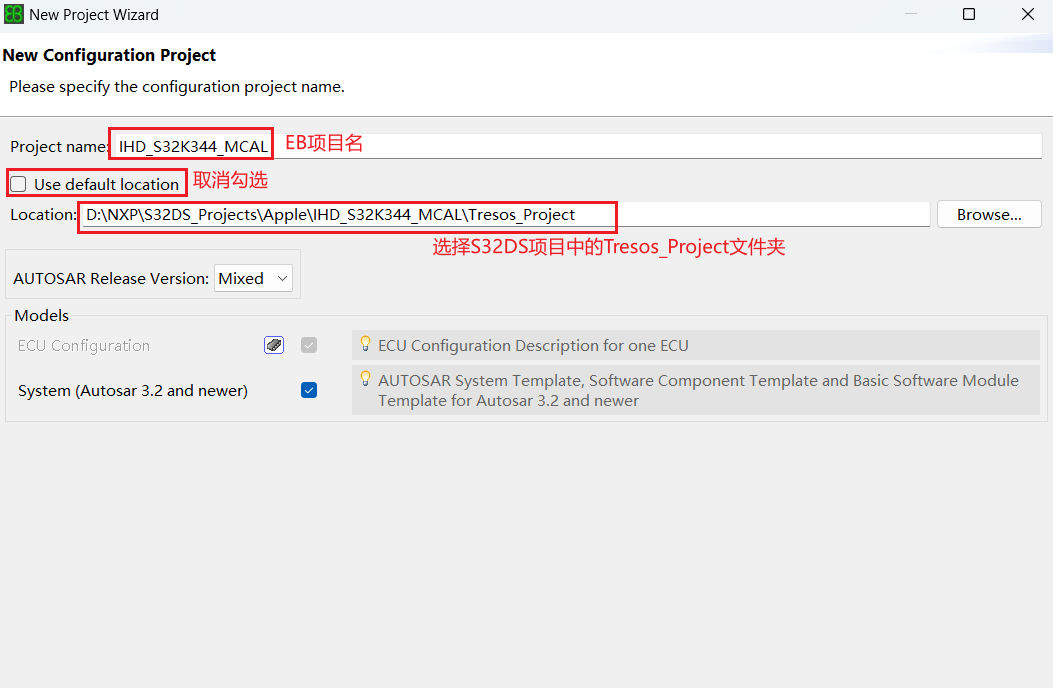
3 EB-Tresos Project

选择新建项目:

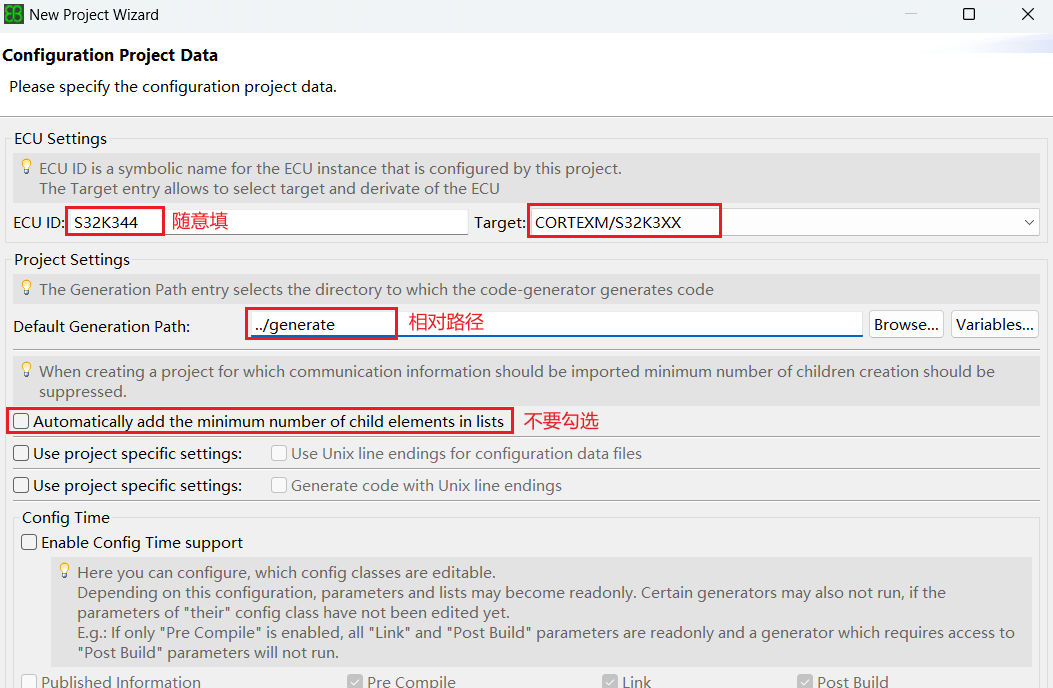
以官方 Dio 点灯为例,添加如下模块(具体项目中使用到了哪些模块就添加哪些模块)
参考官方示例代码,在已安装的 MCAL 路径下: SW32K3_RTD_R21-11_4.0.0_HF_02\eclipse\plugins\Dio_TS_T40D34M40I0R0\examples\EBT\S32K3XX\Dio_Example_S32K344\TresosProject\Dio_Example_S32K344

复制 SW32K3_RTD_R21-11_4.0.0_HF_02\eclipse\plugins\Dio_TS_T40D34M40I0R0\examples\EBT\S32K3XX\Dio_Example_S32K344\TresosProject\Dio_Example_S32K344 路径下 config 文件夹下的所有文件到 S32DS 项目 Tresos_Project 下的 config 中(覆盖原文件)

然后在 EB 中生成代码:
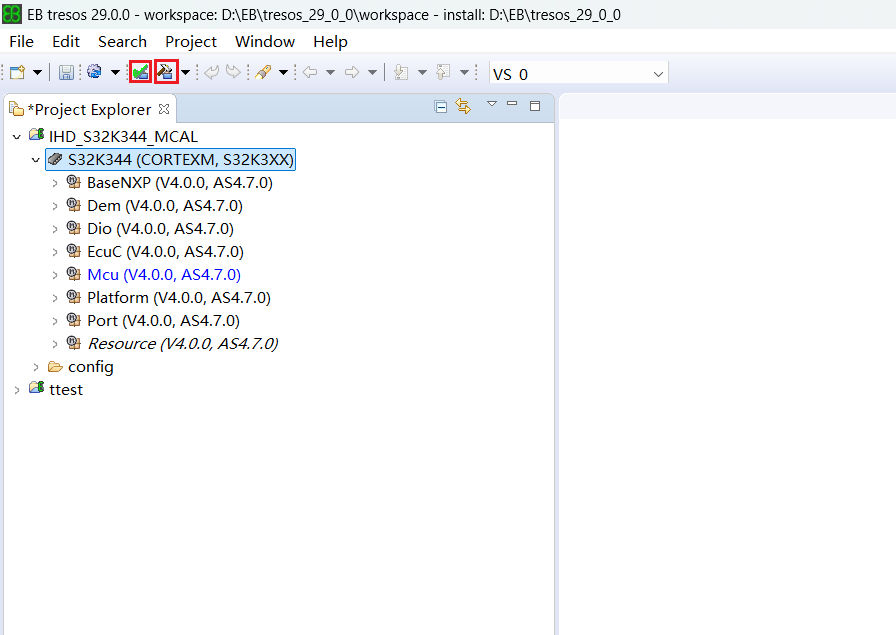
此时,刷新 S32DS 后 generate 下就有生成的代码了:

4 编译

复制 Dio 示例代码 D:\NXP\exe\SW32K3_RTD_R21-11_4.0.0_HF_02\eclipse\plugins\Dio_TS_T40D34M40I0R0\examples\EBT\S32K3XX\Dio_Example_S32K344\src 下的 main.c 替换 S32DS 项目下 src 中的 mian.c ;
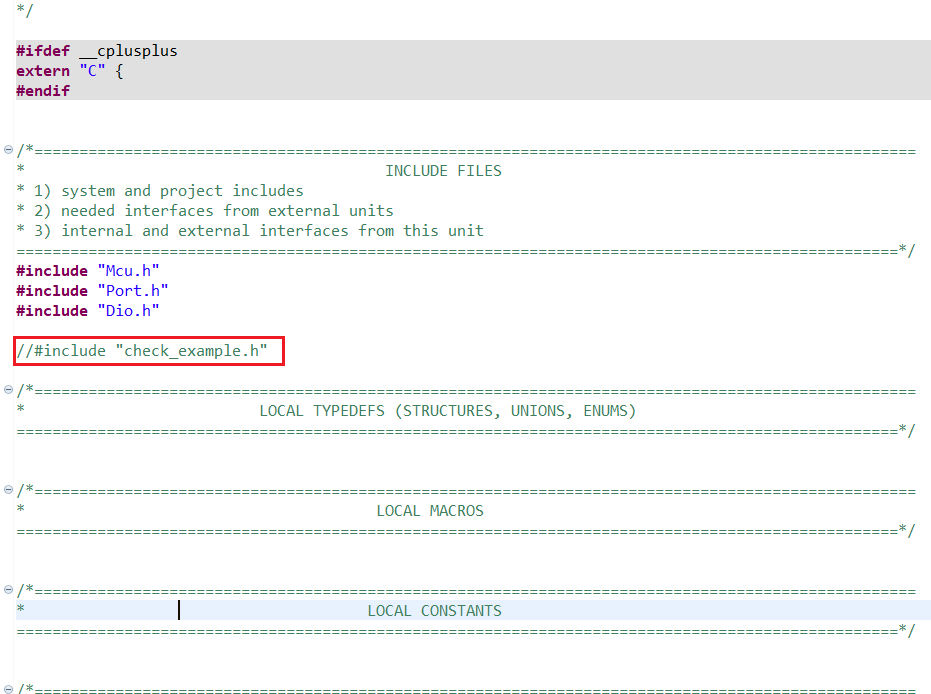
并且注释掉 #include "check_example.h"Exit_Example(TRUE);

先将 S32DS 项目下 MCAL 中的所有模块移除编译路径:
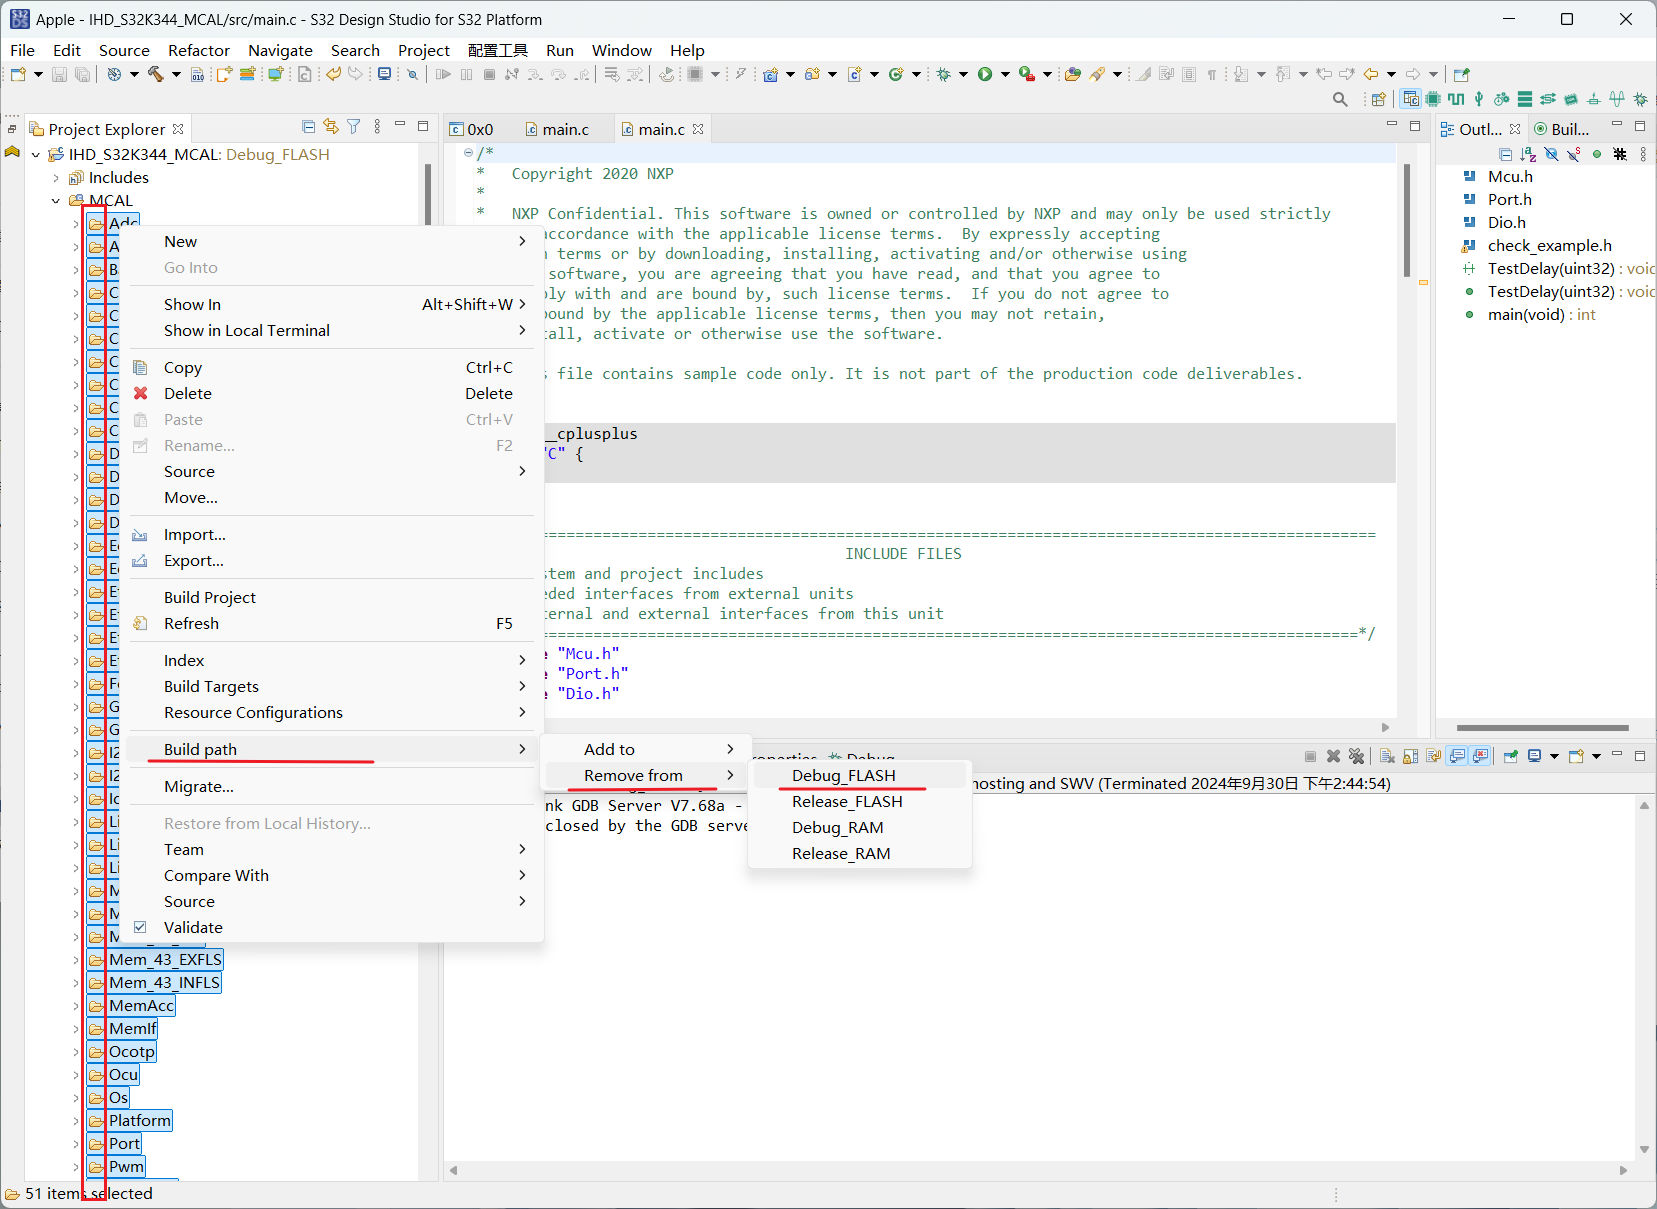
根据 Dio 官方示例添加所需的模块到编译路径:

接下来,就是编译处理报错:

此处报错说找不到这个 SchM_Enter_Dio_DIO_EXCLUSIVE_AREA_01

为了方便搜索,用 VSCode 打开这个 S32DS 项目:

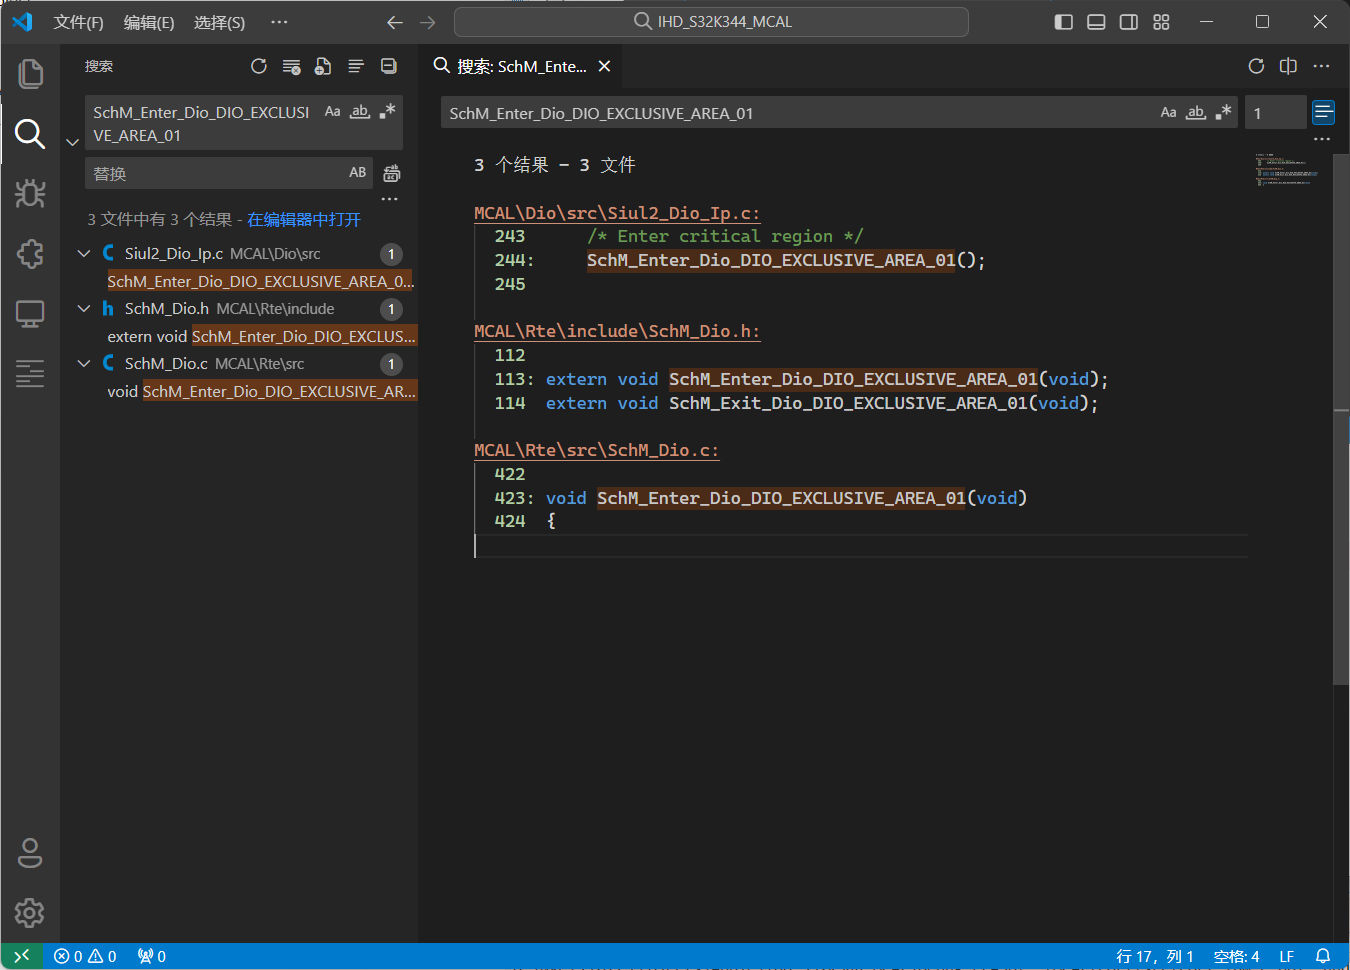
在 VSCode 中搜索 SchM_Enter_Dio_DIO_EXCLUSIVE_AREA_01

可以看到,MCAL\Dio\src\Siul2_Dio_Ip.c 调用了 SchM_Enter_Dio_DIO_EXCLUSIVE_AREA_01 函数,其函数的定义是在 MCAL 的 Rte 模块中。那么就添加 MCAL/Rte 到编译路径中:
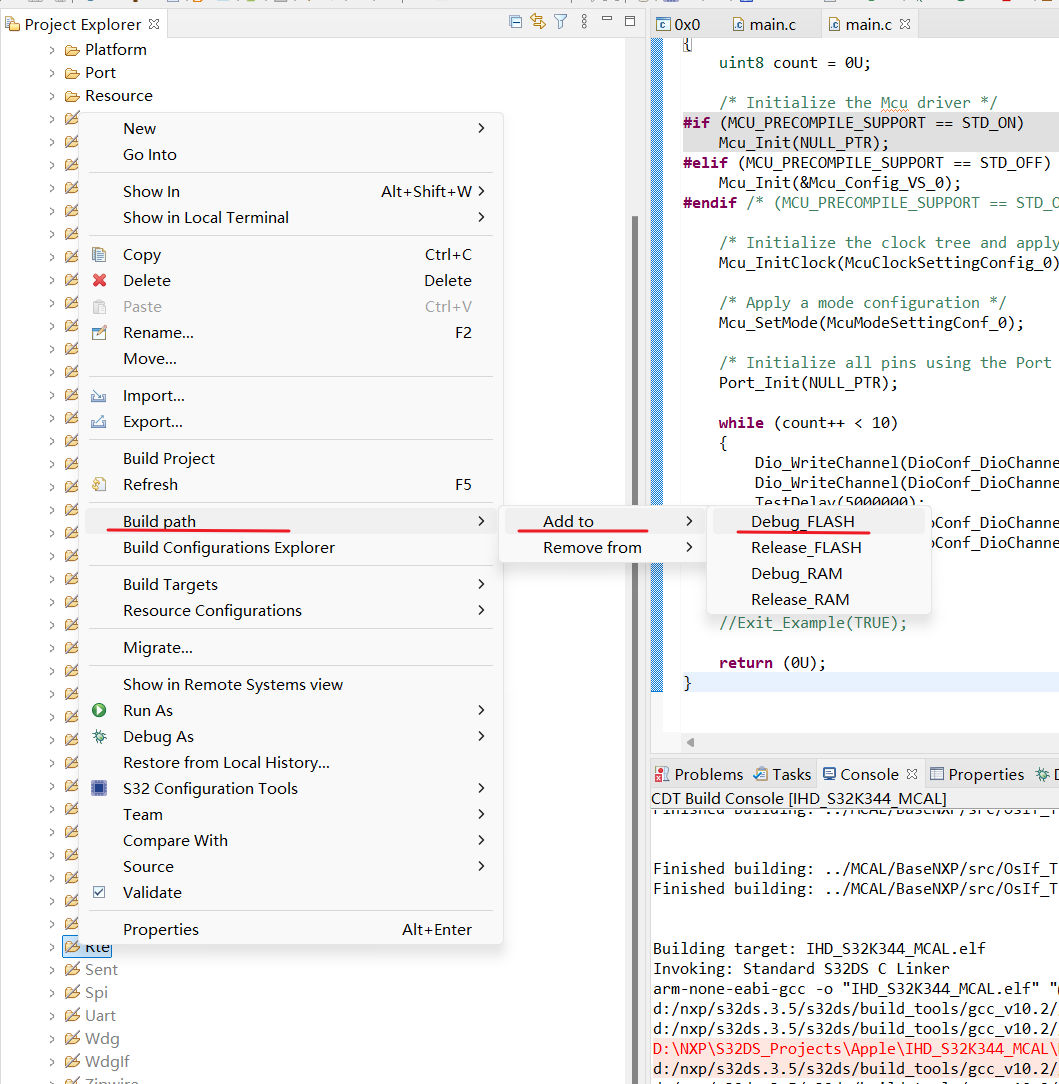
再次编译:

显然,需要添加 MCAL/Det 模块到编译路径中:

再次编译,没有错误了:

烧录测试后,LED 正常闪烁!


S32DS集成MCAL
https://jwlee36963.github.io/posts/f2c01706/
作者
jw
发布于
2024年9月30日
许可协议