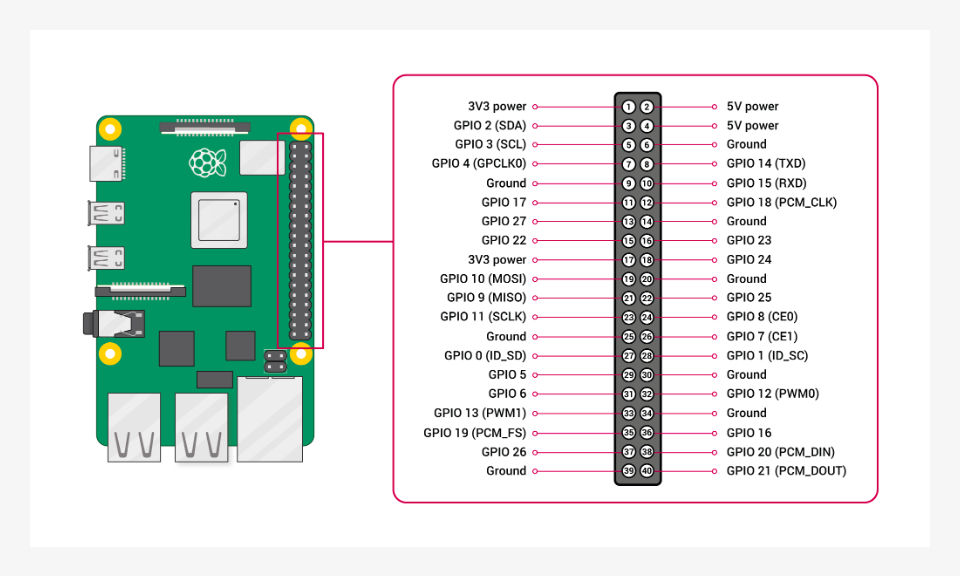
1 选择 GPIO 引脚
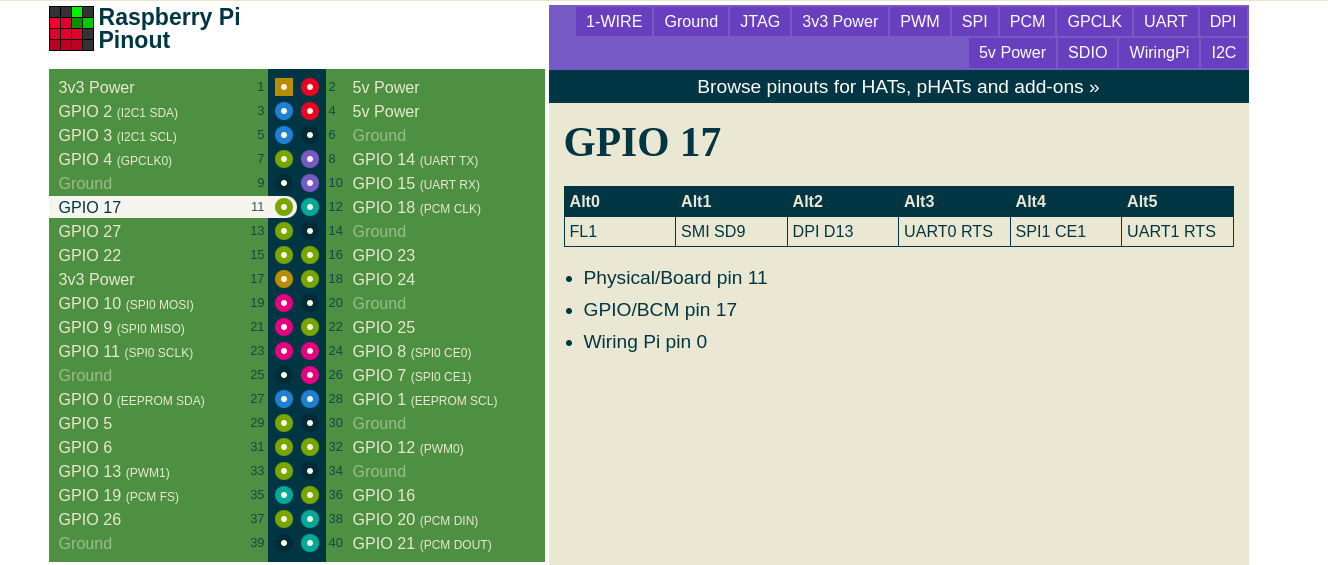
在树莓派的扩展口中以 GPIO17 为例,点亮 LED 灯。

GPIO17 介绍:

2 配置设备树 dts
树莓派5 的设备树文件是 arch/arm64/boot/dts/broadcom/bcm2712-rpi-5-b.dts :
1
| #include "arm/broadcom/bcm2712-rpi-5-b.dts"
|
因为包含了 arm 下的 dts,所以修改 arch/arm/boot/dts/broadcom/bcm2712-rpi-5-b.dts,添加 jw_led 节点:
1
2
3
4
5
6
7
8
9
10
11
12
13
14
15
16
17
18
19
20
21
| / {
...
led: leds {
...
};
jw_led: jw_gpio17 {
};
...
};
...
#include "rp1.dtsi"
...
gpio: &rp1_gpio {
status = "okay";
};
&jw_led {
compatible = "jw,jwled369";
led-gpios = <&gpio 17 GPIO_ACTIVE_HIGH>;
}
|
关于 rp1 芯片阅读官方的数据手册。
代码如下:
1
2
3
4
5
6
7
8
9
10
11
12
13
14
15
16
17
18
19
20
21
22
23
24
25
26
27
28
29
30
31
32
33
34
35
36
37
38
39
40
41
42
43
44
45
46
47
48
49
50
51
52
| #include <linux/of.h>
#include <linux/gpio/consumer.h>
#include <linux/platform_device.h>
#include <linux/module.h>
#define DRIVER_NAME "jw_led"
struct jw_led {
struct gpio_desc *gpio;
};
static int jw_led_probe(struct platform_device *pdev)
{
struct jw_led *led;
led = devm_kzalloc(&pdev->dev, sizeof(struct jw_led), GFP_KERNEL);
if (!led)
return -ENOMEM;
platform_set_drvdata(pdev, led);
led->gpio = devm_gpiod_get_index(&pdev->dev, "led", 0, GPIOD_OUT_LOW);
if (IS_ERR(led->gpio)) {
dev_err(&pdev->dev, "Failed to get jw_led/led-gpios property: %ld\n",
PTR_ERR(led->gpio));
return PTR_ERR(led->gpio);
}
return 0;
}
static const struct of_device_id jw_led_of_match[] = {
{ .compatible = "jw,jwled369", },
{ },
};
MODULE_DEVICE_TABLE(of, jw_led_of_match);
static struct platform_driver jw_led_driver = {
.probe = jw_led_probe,
.driver = {
.name = DRIVER_NAME,
.of_match_table = jw_led_of_match,
},
};
module_platform_driver(jw_led_driver);
MODULE_AUTHOR("jw.lee");
MODULE_DESCRIPTION("LED driver");
MODULE_LICENSE("GPL v2");
|
最后,编译成模块在树莓派上 insmod 即可。

